
In this edition of our regular Arduino and Proteus tutorials, we have once again come out with a very cool project called Automatic Stair light Simulation in Proteus 8.11. This Do-it-yourself intelligent (sensor or manual activated) stair lighting from HomeMade Electronics lights up your stairs automatically when you enter the staircase area. This project saves energy and reduces your electricity bill.
The actual project (Automatic stair light system) uses Arduino Nano and Ultrasonic sensors. However, due to simulation and simplicity, the ultrasonic sensor has been replaced with push buttons. You can click here or request the ultrasonic version in the comment section.
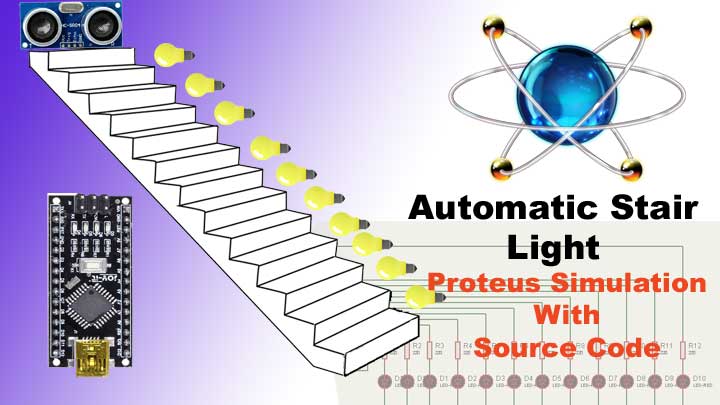
Automatic Stair Light designed and simulated in Proteus. The system detects the presence of humans and lights up the LEDs in sequential order. The real constructed system makes use of Arduino Uno and an ultrasonic or motion sensor for automatic detection.
However, I used two push buttons to construct this automatic stair light as you can see from the video below for simulation purposes which can also be physically implemented with real functional components. For code and diagram of the project with either an ultrasonic sensor or motion sensor, kindly leave a comment.
Also, check these Projects:
When the circuit is activated, it lights the LEDs sequentially, starting from where the user is detected. So for instance, if the user is climbing up the stairs, the LEDs will start illuminating from the base of the stairs and gradually move to the top.
As soon as the user reaches the top, the sensor detects the presence and triggers the system to turn off the LEDs again starting from the bottom.
This automatic stair light can be configured from the Arduino code to change the speed at which the LEDs transition from the ON state to the OFF. To edit the speed, you can refer to the code below:
 int tOn = 300; //LED On delay
 int tOff = 4000; //LED Off delay
Check the video demonstration of the project below:
Arduino Code
const int ledPins[] = {13, 12, 11, 10, 9, 8, 7, 6, 5, 4, 3, 2};
const int numLeds = sizeof(ledPins) / sizeof(ledPins[0]);
const int bUpPin = A0;
const int bDownPin = A5;
const int tOn = 300;
const int tOff = 4000;
unsigned activeUp = 0;
unsigned activeDown = 0;
void setup() {
  Serial.begin(9600);
  Serial.println("Activated");
  for (int i = 0; i < numLeds; i++) {
    pinMode(ledPins[i], OUTPUT);
  }
  pinMode(bUpPin, INPUT_PULLUP);
  pinMode(bDownPin, INPUT_PULLUP);
  Serial.println("Pins set");
  Serial.print("active up: ");
  Serial.println(activeUp);
  Serial.print("active down: ");
  Serial.println(activeDown);
  Serial.println("Variables set");
  Serial.println("Ready");
}
void loop() {
  int up = digitalRead(bUpPin);
  int down = digitalRead(bDownPin);
  if (up == LOW) {
    Serial.println("Bottom button pressed!");
    if (activeUp == 1 || activeDown == 1) {
      Serial.println("System active!");
      offDown();
    } else {
      Serial.println("System activated (up)");
      onUp();
    }
  }
  if (down == LOW) {
    Serial.println("Top button pressed");
    if (activeUp == 1 || activeDown == 1) {
      Serial.println("System active!");
      offUp();
    } else {
      Serial.println("System activated (down)");
      onDown();
    }
  }
}
void setLeds(bool state) {
  for (int i = 0; i < numLeds; i++) {
    digitalWrite(ledPins[i], state);
    delay(state ? tOn : tOff);
  }
}
void onUp() {
  Serial.println("Switching on lights (up)");
  setLeds(HIGH);
  activeUp = 1;
  Serial.print("active up: ");
  Serial.println(activeUp);
  Serial.print("active down: ");
  Serial.println(activeDown);
  Serial.println("System now active (up)");
}
void offUp() {
  Serial.println("Switching lights off (Up)");
  setLeds(LOW);
  activeUp = 0;
  activeDown = 0;
  Serial.print("active up: ");
  Serial.println(activeUp);
  Serial.print("active down: ");
  Serial.println(activeDown);
  Serial.println("System not active");
}
void onDown() {
  Serial.println("Switching lights on (down)");
  setLeds(HIGH);
  activeDown = 1;
  Serial.print("active up: ");
  Serial.println(activeUp);
  Serial.print("active down: ");
  Serial.println(activeDown);
  Serial.println("System now active (down)");
}
void offDown() {
  Serial.println("Switching lights off (down)");
  setLeds(LOW);
  activeUp = 0;
  activeDown = 0;
  Serial.print("active up: ");
  Serial.println(activeUp);
  Serial.print("active down: ");
  Serial.println(activeDown);
  Serial.println("System not active");
}
Code explanation of the Automatic Stair Light
Now let’s go through the code step by step so that you will understand how the system works:
const int ledPins[] = {13, 12, 11, 10, 9, 8, 7, 6, 5, 4, 3, 2};
const int numLeds = sizeof(ledPins) / sizeof(ledPins[0]);
In this part of the code, we define an array ledPins to hold the pin numbers of the LEDs and numLeds to store the number of LEDs in the array.
const int bUpPin = A0;
const int bDownPin = A5;
Here, we define constants for the button pin numbers for better readability.
const int tOn = 300;
const int tOff = 4000;
These constants represent the delay times for turning the LEDs on and off.
unsigned activeUp = 0;
unsigned activeDown = 0;
We define two unsigned integer variables to track whether the system is active going upward (activeUp) or downwards (activeDown).
void setup() {
  // ...
}
The setup() function is where the initial setup of the Arduino happens.
void loop() {
  // ...
}
The loop() function is where the main logic of your program runs repeatedly.
Inside the loop() function, we read the state of the buttons:
int up = digitalRead(bUpPin);
int down = digitalRead(bDownPin);
We read the state of the buttons using digitalRead() and store the result in the variables up and down.
if (up == LOW) {
  // ...
}
If the bottom button (up) is pressed (LOW state), we check whether the system is already active going upwards or downwards. If it’s active, we turn off the lights using the appropriate function (offDown()). Otherwise, we activate the system going upwards (onUp()).
if (down == LOW) {
  // ...
}
If the top button (down) is pressed (LOW state), we follow a similar logic as above, but this time for activating the system going downwards (onDown()) or turning off the lights going downwards (offUp()).
The functions onUp(), offUp(), onDown(), and offDown() are responsible for controlling the LEDs based on the selected direction. They use the setLeds() function to turn the LEDs on or off sequentially, with appropriate delays.
The code structure and logic in these functions are similar, so I’ll explain one as an example:
void onUp() {
  Serial.println("Switching on lights (up)");
  setLeds(HIGH);
  activeUp = 1;
  Serial.print("active up: ");
  Serial.println(activeUp);
  Serial.print("active down: ");
  Serial.println(activeDown);
  Serial.println("System now active (up)");
}
In the onUp() function:
- We print a message to indicate that the lights are being switched ON and going upwards.
- We call the
setLeds(HIGH)function to turn the LEDs on. - We set the
activeUpvariable to 1 to indicate that the system is now active and going upwards. - We print the values of
activeUpandactiveDown. - We print a message to indicate that the system is now active and going upwards.
The offUp(), onDown(), and offDown() functions follow a similar pattern but with their respective operations.
I believe you now understand how the code works. If you encounter any problems, or if you need help constructing this automatic stair light project, leave a comment below.


Please Could you be so kind as to share the code and diagram of the Automatic Stair Light project with either an ultrasonic sensor or motion sensor with me?
I learn more on here about embedded systems and electronics, than anywhere else, for which I’m grateful to you.
Can you tell me the Arduino pins you want to use for the ultrasonic sensor?
Specifically, the Echo and Trigger pins. Or if you want me to decide the pins myself, let me know.
It would be best if you decided that Sir.
Hello Sir
Hello Nana Yaw
I have written a complete articles on that at: https://lizbotech.com/how-to-make-automatic-stair-lights-with-arduino-and-ultrasonic-sensor/
Check it out
i want the nature of work ….How it works?
The real system detects the presence of humans and turns ON the stairs light. When the person climbs or descends, the system automatically turns OFF the lights.
What changes should I make in the code section to turn on only lights of two steps ahead only and turn off previous stairs lights as I move ahead, and what should be added in case someone has fallen off from stairs?
It would be a great help if you suggest what changes should I make.
Do you mean to turn the light on or off based on the user’s location? If so then there should be separate sensors for each step.
que cabios devo haser para poner los censores?
¿Quieres decir con sensores ultrasónicos reales?