This project is about building an Arduino Uno 4-way traffic system with a pedestrian button in Proteus. It can also be implemented easily with real components since the coding is directly done in Arduino IDE before it was exported to Proteus.
Installing Arduino Libraries in Proteus
Watch this video if this is your first time using the Protest ISIS software.
The video will help you to install all the necessary libraries. These libraries include the popular Arduino Uno, Mega, and Nano boards. You will also get libraries for sensors such as the smoke sensor, Infrared sensor, proximity sensor, and motion sensor to mention but a few.
Also, check this post on how to Control home appliances with voice Using Google Assistant.
The Proteus simulation files, as well as the Arduino sketches, have been provided in this post. You can download and modify it per your preference. However, if you change the Arduino pin connections to the LEDs, you will also need to recompile the Arduino source code from the IDE and re-export the hex file to Proteus ISIS.
If this is your first project with the Arduino development board read the introduction to Arduino programming.
Brief About the 4-Way Arduino Traffic System
Traffic is a major challenge in many cities in the world today. The number of vehicles is gradually increasing day by day all over the world. In many instances, traffic flow is directed by devices such as traffic lights.
Traffic lights have become an integral part of human day-to-day life activities. This article focuses on the construction of an Arduino traffic light system developed and programmed with the Proteus ISIS and Arduino IDE respectively.
This system was designed to control vehicular movement as well as assist pedestrians crossing with an interruptible bush button. The button when pushed will interrupt the normal sequence of the traffic control and thus start the pedestrian crossing cycle for a predetermined period of time. This will, therefore, allow people to cross the road.
The programming platform for the simulation of the Arduino traffic light system was done purely with the Arduino IDE. For this reason, the project can be physically assembled with real components off the shelf.
Getting the required Components and Software
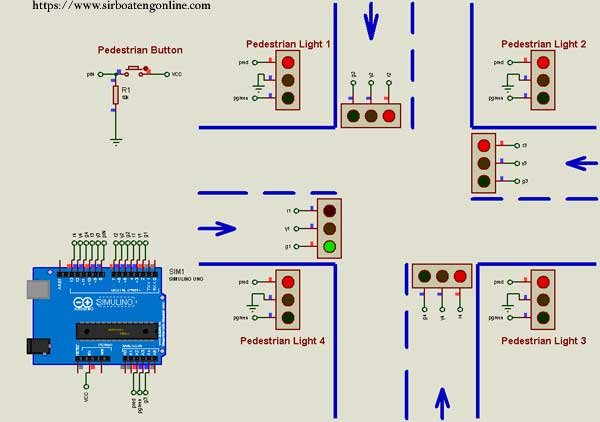
This is a 4-way Arduino traffic system that has a main and a pedestrian lighting circuit. As soon as the pedestrian button is pressed, the program waits till the main process tries to jump to the next state before performing a pedestrian cycle. The components below are needed to build this project.
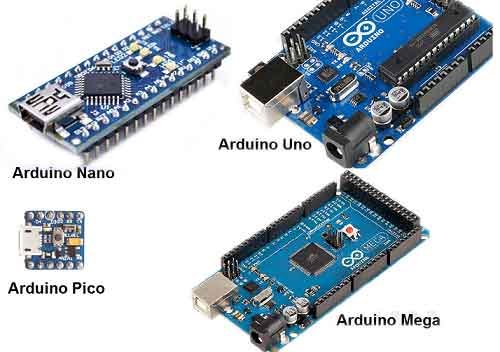
- Arduino Uno (I used the Arduino Uno library for Proteus).
- LED x20 ( I used 8 pieces of the Traffic light module in Proteus).
- Push Button
- 10kΩ Resistor
- 220Ω x20 limiting resistors (Only for those who want to physically design the project, this is because the proteus traffic light module can be used without limiting resistors.)
- To physically design this project, you will also need a power supply and connecting wires.
Building the 4-way Arduino Traffic System in Proteus.
Whilst I will be drawing the circuit from scratch, the completed version can be found in the downloadable zip file provided on this page. As a matter of fact, those who are familiar with Proteus and the general circuit design procedures may choose to download and use this ready-made design and move on to the Arduino Programming section.
Furthermore, as I have provided the complete Proteus circuit diagram together with the Arduino code (Sketch), Those who are familiar with both Arduino programming and Proteus can skip this tutorial and download the provided files.
Also, check these related articles:
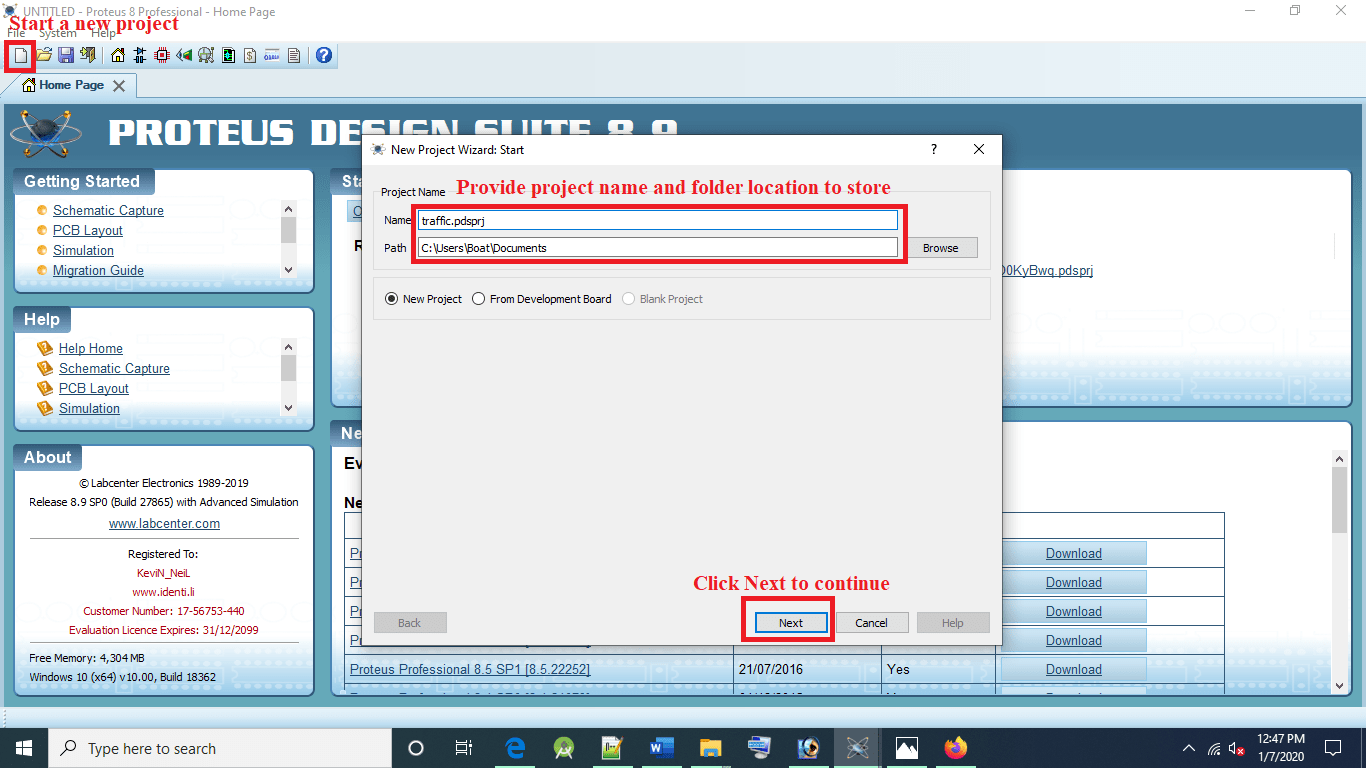
Step 1: Placing the Arduino Traffic System Components.
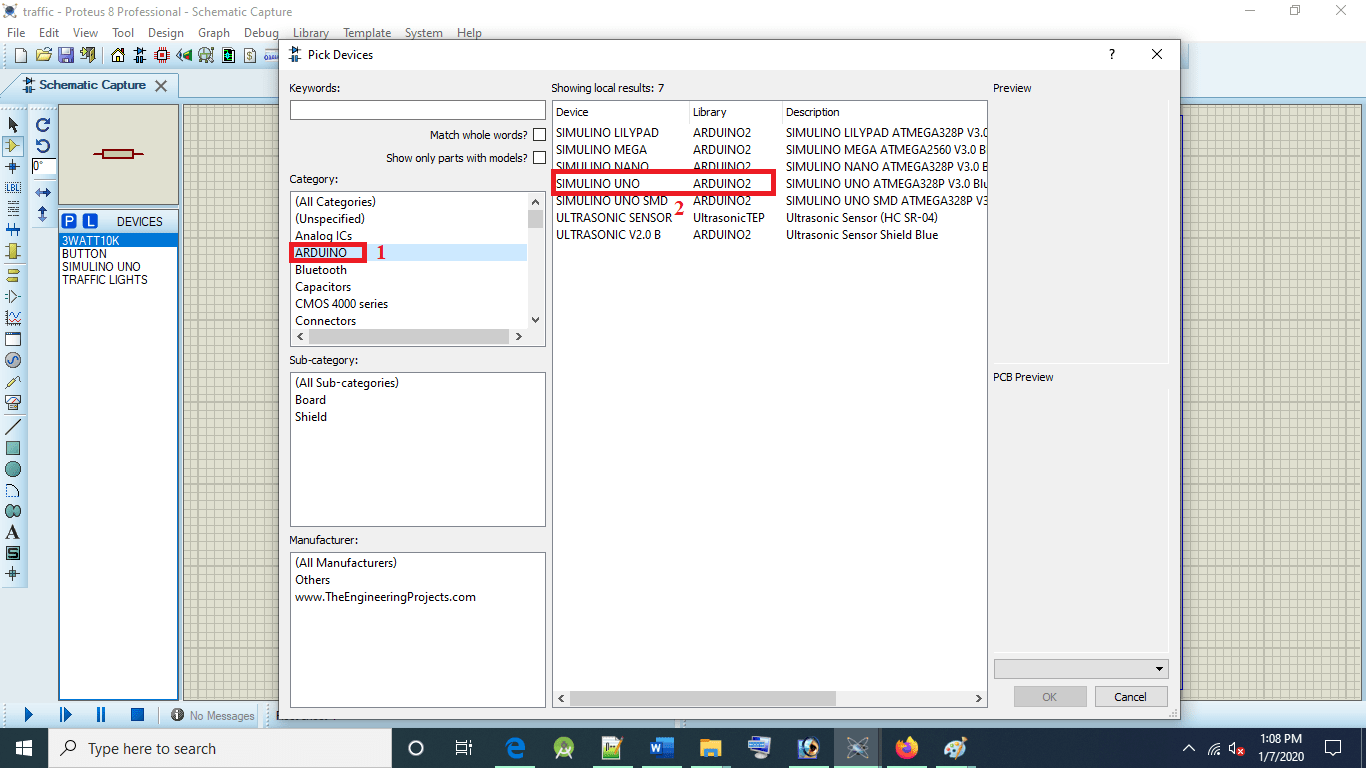
The first thing to do is to open proteus, start a new project with default values and place the required components. On the new schematic layout, click on the Component icon and then click on the letter ‘P’ which is located above the Object Selector pane.

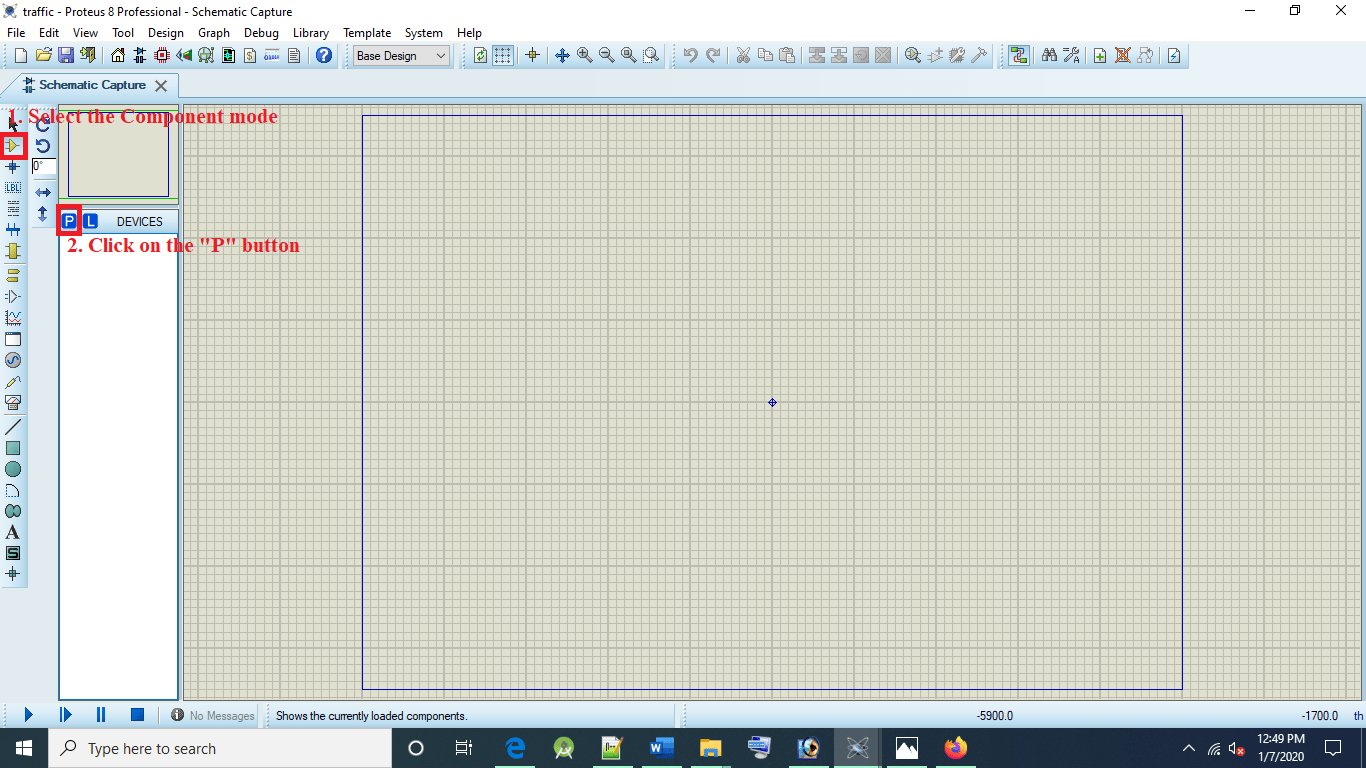
As soon as you click on the “P” button, the Device Library selector window will immediately open. Select the Arduino from the Category pane and double-click on the “Arduino Uno” from the device list space on the right side of the Category pane. This will result in the component name appearing in the Object Selector in the editing window.
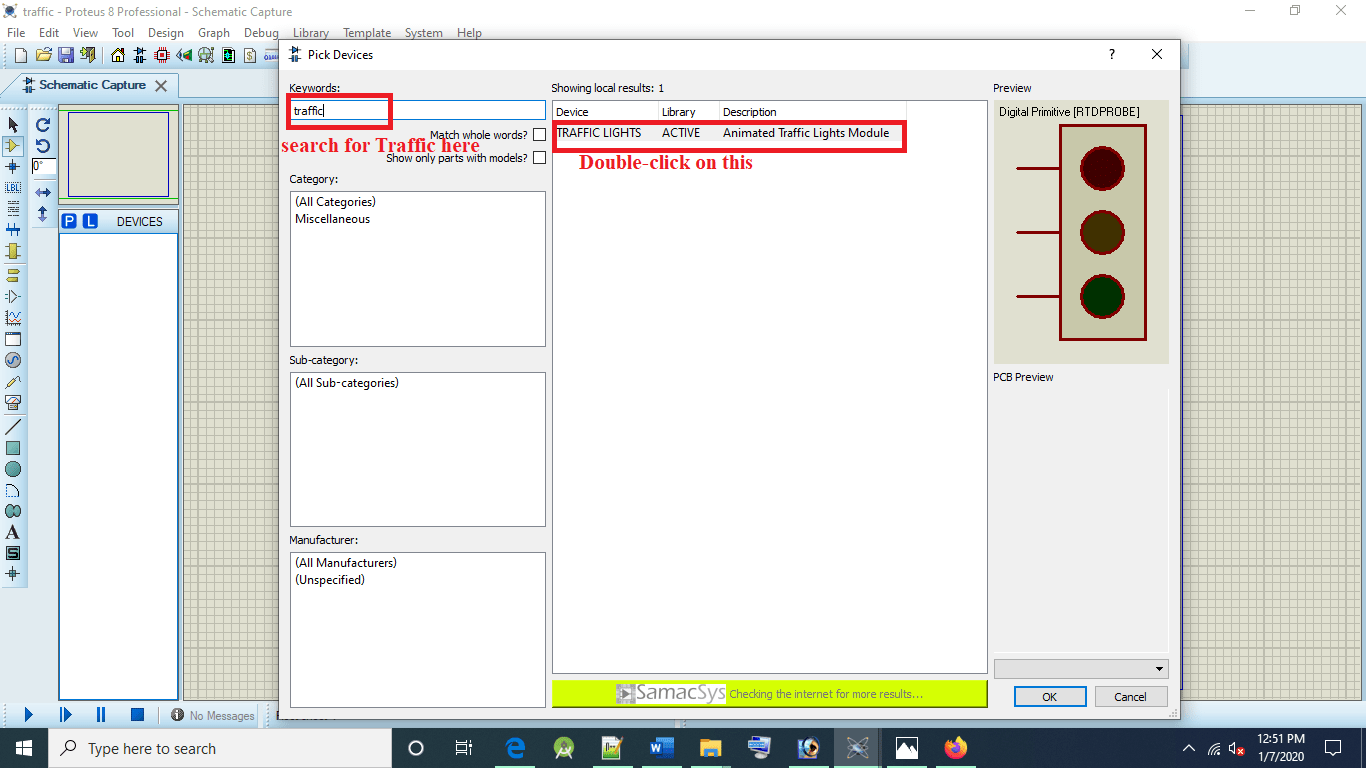
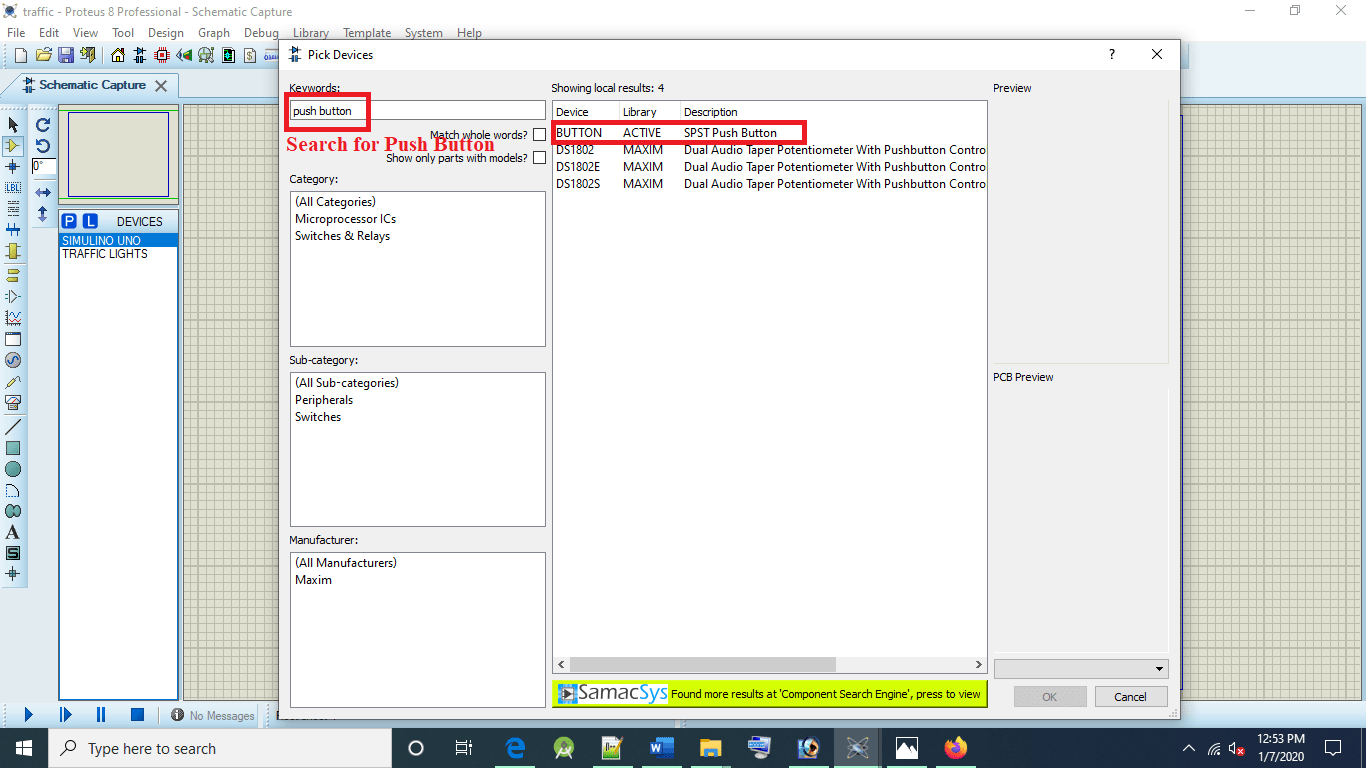
Likewise, search for “Traffic” and double-click it in the list panel to be added to the “Object Selector” pane. Again, repeat the steps to add the “Push button” and the “Limiting Resistor” to the Object Selector pane.
Once, you have added the required modules, close the Device Library Selector. Select the Arduino Uno by clicking on it in the Object Selector. Now, move the mouse and click on the Editing Window to place the component on the schematic.
Repeat the step above to place Eight sets of traffic light modules, the push button, and the resistor on the schematic.
Step 2: Alignment and Orientation of placed components
You may have noticed that the components aren’t aligned or arranged the way you had wanted them to be. Don’t worry, Proteus was developed with advanced tools that cater to components’ orientation, movement, and rotation.
To move a component (Module) to a specific place in the schematic window is just as easy as selecting the component and dragging it to your preferred place.
Moreover, you can also rotate a component in Proteus. This can be done in two ways. The mouse method or the keyboard shortcut. To rotate a component using the mouse button, select the component and right-click the mouse. Now depending on how you want the component to appear, you may either select “Rotate Clockwise”, “Rotate Anti-Clockwise”, or “Rotate 180 degrees“.
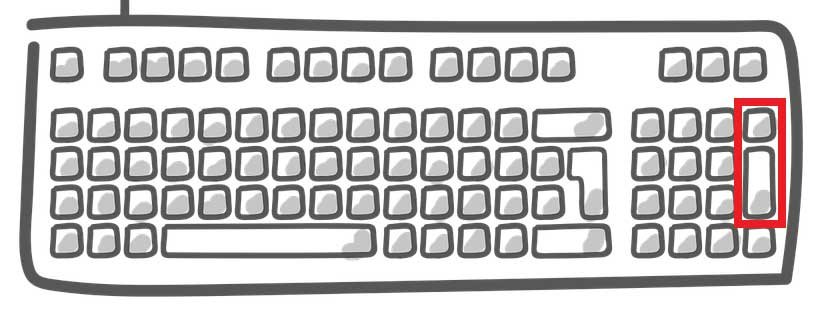
On the other hand, you may also use the keyboard shortcut keys to change the orientation. To rotate in the clockwise direction, select the component or module and press the minus (-) of the numeric key. Likewise, use the plus (+) key to rotate anti-clockwise. Check the image below.
Step 3: Wiring Up the 4-way Arduino Traffic System
Now that you have adjusted the orientation of the modules, it is time we hook up the pins. This can be done in many ways. The easiest way is to use the “Wire Auto-route” option available on the Tool Menu.
With this option enabled, all you have to do is to click on both pins, and the software will automatically route around obstacles and find a suitable path to create the connections. You can also link pins with wires, which can be tracked manually from one pin to another.
However, in this 4- way Arduino traffic system project, I used the terminal method of wiring. With the terminal method, you just put terminals (usually selecting the default terminal from the Object Selection pane) on each module’s pins and label them with the same name.
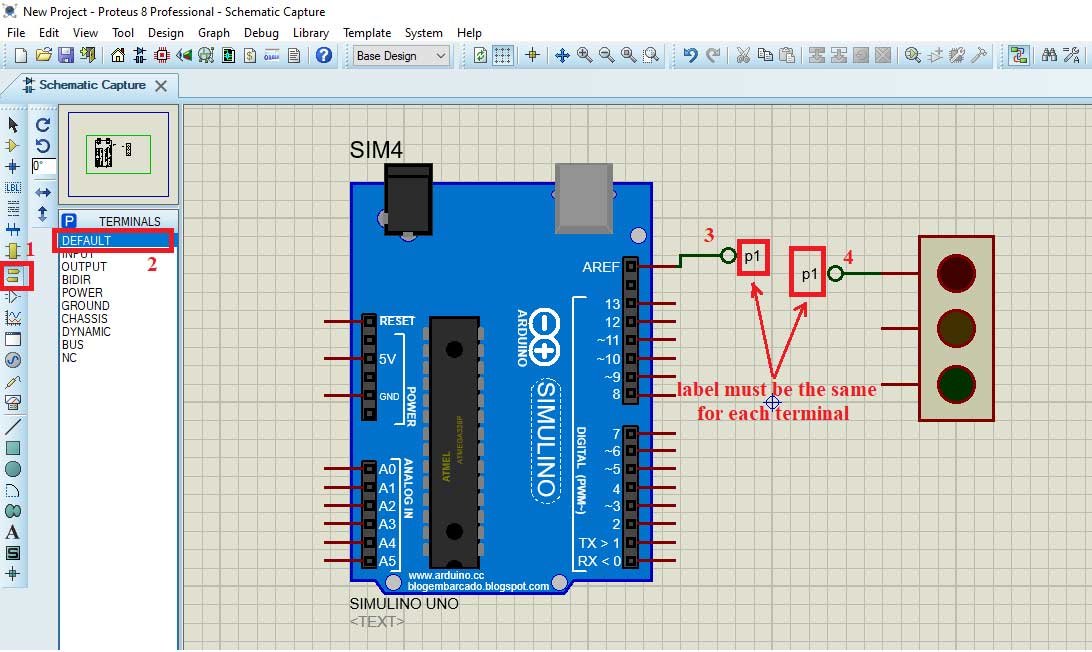
The image above shows the traffic light module connected to the “AREF” pin of the Arduino Uno. For the system to work, always remember to use different label names for different links unless they all share a common wire.
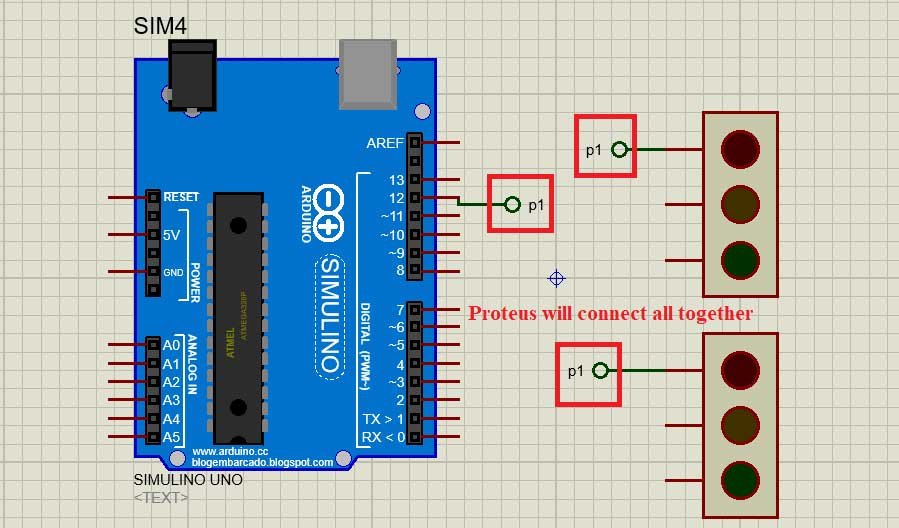
For instance, if two pins are connected to pin 12 of the Arduino Uno, you should label them with the same name as shown below. Invisibly, Proteus will automatically link the pins during the simulation.
Step 4: Writing the code and Import them to Proteus
The programming codes (Sketches) for this 4-way Arduino traffic system have been provided at the end of the post. Download the file and unzip it to a folder on your computer.
Now in the Proteus ISIS, double-click on the Arduino Uno and click on the “folder” icon next to the “Program File” textbox.
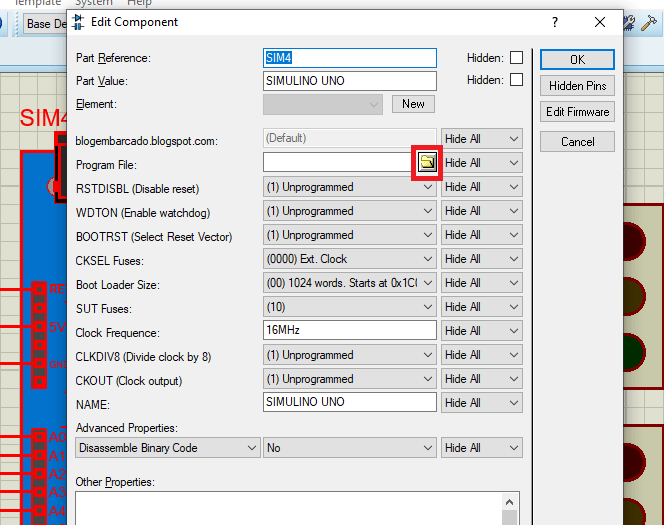
Locate the folder where you have extracted the downloaded files and select the “Hex” file with the filename “traffic_with_pedestrian.ino.standard.hex“. Click on Open, then OK to load the code into the Arduino Uno in Proteus. You can now run the simulation.
Congratulations!, you now have a working Arduino traffic system with a pedestrian button that can be run on Proteus simulation or using real components.
Downloading the required files
Conclusion
The project works to perfection during the simulation and will work with no doubt when you decide to implement it physically. Check the video below.
For help in building and simulating this Arduino traffic system, or if you have a better idea for improving it, kindly let me know in the comment box below.

WX
DD
CU
UH
QM
TG