

A laptop needs an operating system to be useful, and you need to know how to install Windows 10 from USB on the TM1 Laptop. This guide will show you how to install Windows 10 from a USB drive on both new and used Teacher Mate One (TM1) laptops.
The steps online here also work for any laptop or desktop computer. The only part that differs is the keyboard combination to change the bootable device order. You can, however, refer to your laptop or desktop manufacturer’s website to know how to enter the boot menu or change the boot order.
What you will need for this tutorial
- A working Laptop or Desktop PC running any recent version of Microsoft Windows (Windows 7, 8, 10, or 11).
- Windows 10 or 11 OS (iso image). You can also use previous versions such as Windows 7, 8, etc. Get one here.
- Rufus Bootable software. Download it here.
- USB flash drive (Pen drive). It should be 8GB or more. Get quality one here.
If you face a problem following this step or can’t find a workaround to enter the boot menu for your laptop, kindly leave a comment below, and I will help you out.
Bootable USB is the easiest way to install Windows 10 on a TM1 laptop since no one wants to use DVD drives anymore, regardless of how old or new the computer is. Both will be able to use the method.
Table of Contents
Why should you install new windows on the TM1 laptop?
You may install new windows on your TM1 laptop if it runs slow or performs poorly. The TM1 uses an SSD to boost your laptop’s performance with an optimum speed. So if your laptop is running slower, installing new windows is high time.
You may also be tempted to install new windows because your TM1 laptop always has intermittent problems. Some of the known problems are disabled sound (audio), TM1 laptop speaker not working even though the audio icon is enabled, poor video quality, system freezing, and persistent “blue screen of death” (BSOD).
You can solve a disabled sound and non-working speaker by installing device drivers. I have outlined detailed steps to download and install all the TM1 laptop drivers. For some problems, you could upgrade to Windows 11 using the Windows Insider Program or install Windows 11 from a USB flash drive for a clean installation.
Follow the steps in this post to install Windows 10 on the TM1 laptop.
Before installing the operating system on your Teacher Mate One laptop, you must make a Windows 10 bootable USB drive. Also, you will need to set your computer to boot from a USB device. This can be done from the BIOS boot option or a boot menu using the keyboard.
In this guide, I’ll show you how to use a bootable USB flash drive to format and reinstall a stable version of Windows 10. Follow the steps to put Windows 10 on a TM1 laptop from a USB drive.
How to install Windows 10 from a USB drive on a TM1 laptop
Installing Windows 10 from a USB is as easy as pie. With this guide, you can set up a new version of Windows on your laptop in just a few minutes.
At the end of the article, there is also a video guide on installing Windows 10 from USB on a TM1 laptop.
To make a bootable Windows 10 USB for installation, you need a good USB flash drive with at least 8GB of free space. Also, it would help if you had a working computer for creating the bootable USB drive. A Windows 10 or 11 image file. ISO to USB bootable software.
Make a Windows 10 USB drive
Please note that the software will delete all the files on your USB drive (Pendrive). Therefore, if you have any important files on the USB drive, kindly copy them somewhere and restore them when you finish installing the windows on the TM1 laptop.
Step 1: On the working PC, download the Windows 10 image (iso) file here. Use this link to see all available windows, including Windows 11 and the latest versions.
Step 2: Plug a USB flash drive into a laptop or desktop computer with Windows OS on it. It’s very important because as stated above, to make a Windows 10 bootable USB drive; you need a laptop or computer that works and has an operating system on it. This computer can be any brand (You can even use another TM1 laptop) and any operating system. It can be running Windows 7, windows 8, windows 10, or Windows 11.
Step 3: Again, on the working PC, download Rufus software here. Open Refuse and locate your Windows 10 or 11 iso image. Refer to the picture below:
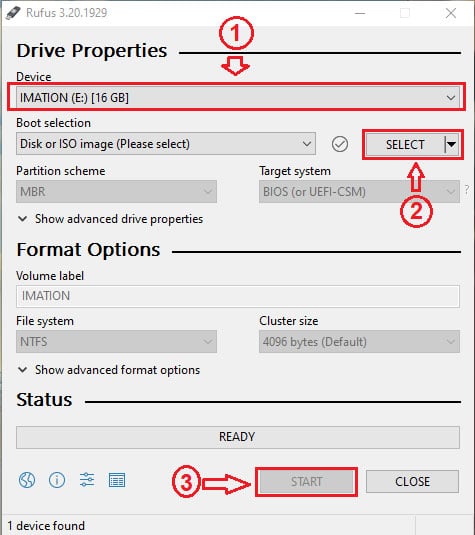
The sequence is straightforward: first, select the USB drive, locate and select the Windows image, leave the rest as default, and click on start. Wait for the process to finish and remove the USB drive from the PC. You have successfully converted your regular USB flash drive to a bootable Windows drive. Move on to the next step.
Boot from the USB flash drive on the TM1 Laptop
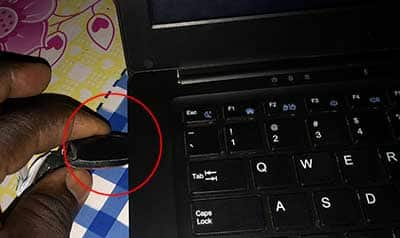
Step 1: Now plug the bootable USB drive into the TM1 Laptop on which you want to install Windows 10 or 11.
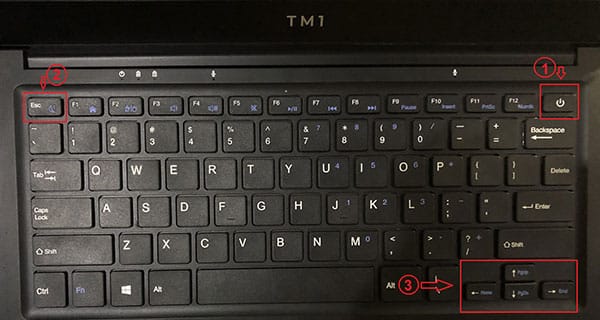
Step 2: This step is optional. You can skip to Step 3. You should only do this if you cannot access the boot menu. Here we go: Switch on the TM1 laptop and immediately start continuously pressing and releasing the escape button (ESC).
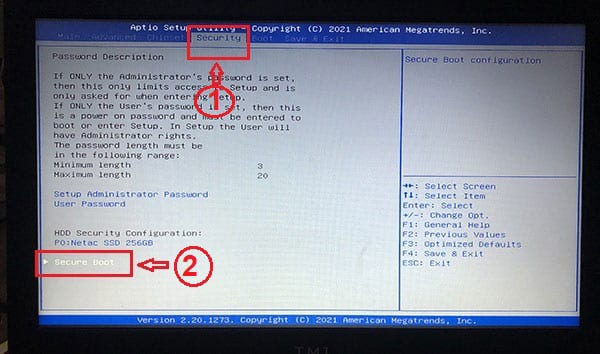
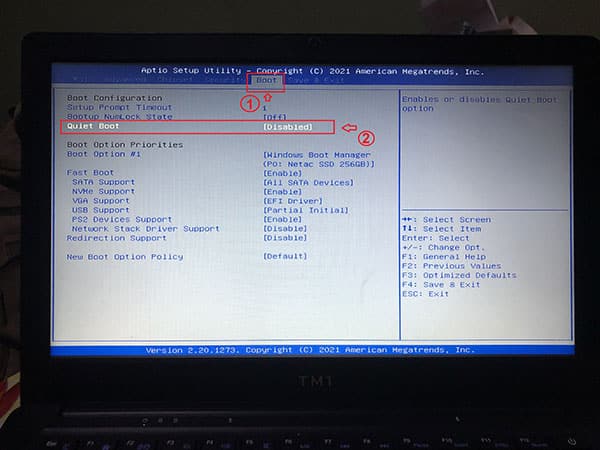
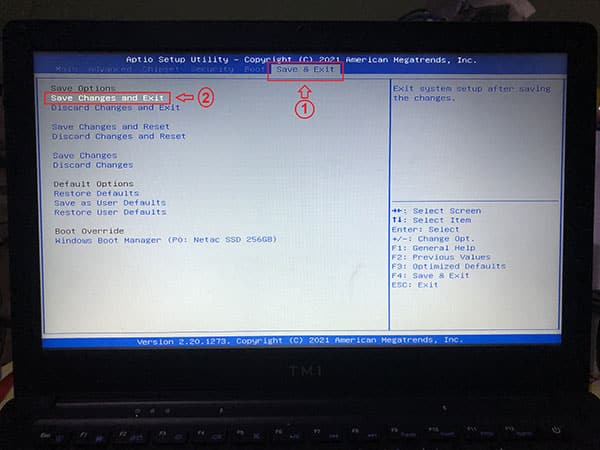
The PC will boot into the BIOS setup. Use the Left and Right keys on the keyboard to navigate to the Boot and Security tab. Now on the Boot tab, disable the “Quite Boot,” and on the Security tab too, disable “Secure Boot.” Move to the Save & Exit tab and select “Save Changes and Exit.”
As I have said earlier, this step is unnecessary; you can skip it. It only ensures that the bootable USB drive works without issues.
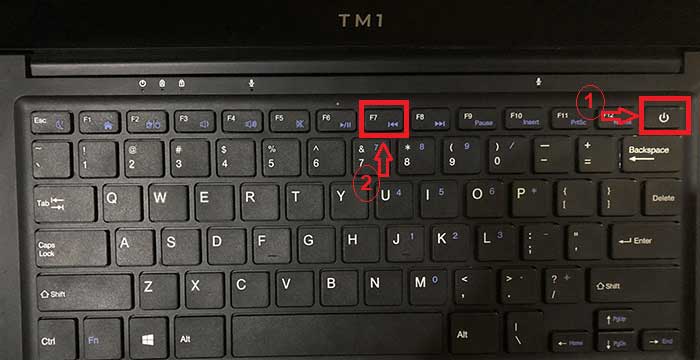
Step 3: Suppose you followed step 2, and the TM1 laptop has restarted, or you have just switched On the machine. Immediately press and release F7 continuously to Open Boot Manager in BIOS. The name of your USB Flash Drive will appear. Now select the USB Flash/Hard Drive option. The computer will Boot (Start) the Windows 10 Setup from USB.
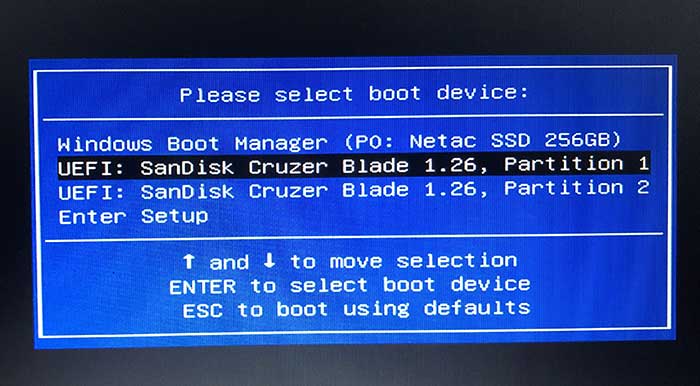
As you can see above, I use a SanDisk Cruzer Blade USB drive. The name of your drive may, however, defer.
Also, check these recommended posts:
Install Windows 10 from the Bootable USB Flash Drive
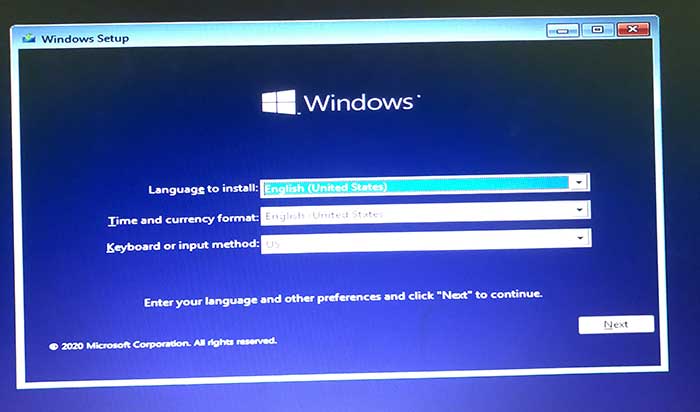
Step 1: Once the computer boots to the Windows installation screen, the system will give the option to select your language. It will also allow you to change the time and currency format. Again, you can change the keyboard type and any input peripheral on the welcome screen. When satisfied with your selection, click Next to move to the next page.
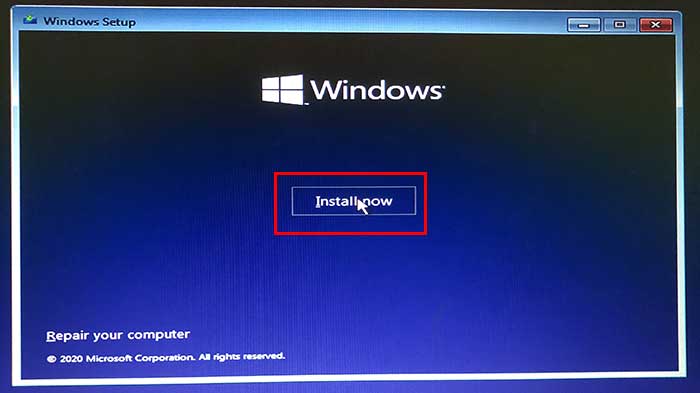
Step 2: On the next page, click on the “Install now” button to start the Windows 10 installation process on the TM1 Laptop.
Step 3: Depending on the edition of Windows 10 or 11 you have downloaded or in your possession, the setup may ask you to select the version you want to install. Select one from the list and click “Next.” This step is optional as it depends on your Windows version (We have x64 and x86 versions of Windows 10).
Step 4: Read and accept the Windows End-user license agreement (EULA) on the page that comes. In some cases, Windows setup will ask you to enter a Windows product key. If it asks you for a product key, click on the tab “I don’t have a product key” and continue with the installation.

Step 5: On the next page, Windows Setup will ask you what installation you want. Since we are doing a completely new setup of Windows 10 on the TM1 Laptop, you should select “Custom: Install Windows only (advanced).”

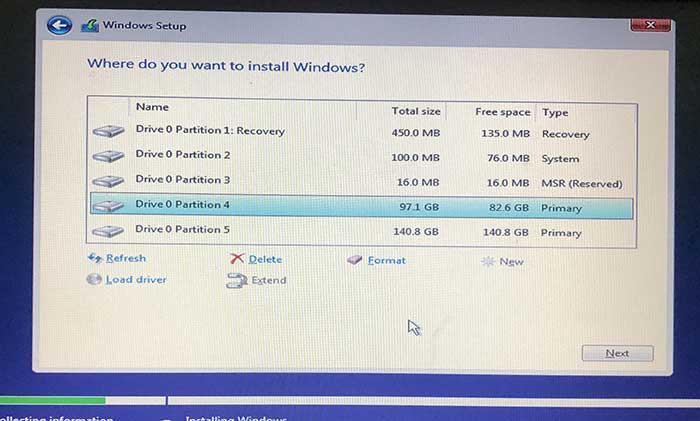
Step 6: Once you get to this stage, the system may list many drives. They are partitions of your system hard drive where you will install Windows 10 or 11.
Also note that since we are installing a fresh copy of Windows, the setup will delete everything on the Laptop. If unsure of what you want, kindly stop at this point, scroll down, and ask questions in the comment box. I will be happy to help you.
Partition and Installing Windows on TM1 Laptop
Step 1: Delete all the partitions by selecting them and clicking the delete button below. You will be left with a single unallocated space. Now, select the unallocated drive, click on New, and click on Apply. The Partition manager will request to create additional partitions for the system. Click on OK.
Put it in the comment box if you want to divide your hard drive to separate your essential files from Windows files.
Step 2: Select the drive with free space in GB (usually Disk 0 Partition 4) and click Next. The Windows 10 Installation will now start. The installation might take some time, so relax. Your TM1 Laptop will restart during this installation process. Please, don’t interrupt the Laptop when it reboots.
Step 3: Were you expecting more steps? Sorry to disappoint; congratulations; your Windows 10 installation on the TM1 laptop has been completed. The only thing left is configuring Windows Settings according to your need.
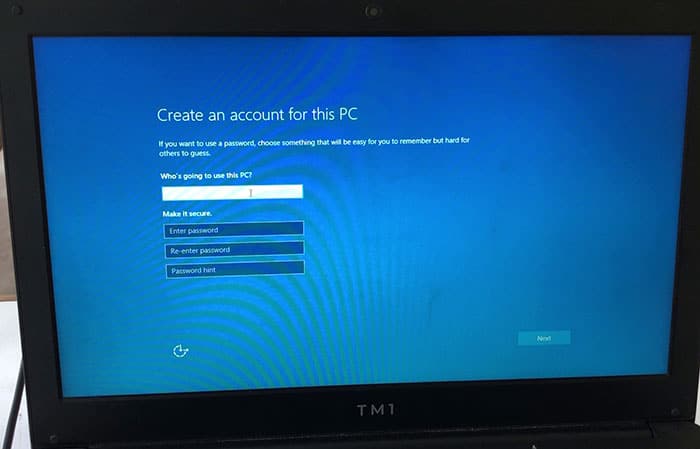
So at this stage, Windows setup will guide you to do the following;
- Select your region
- Set User Account Name
- And User Account Password (If you want)
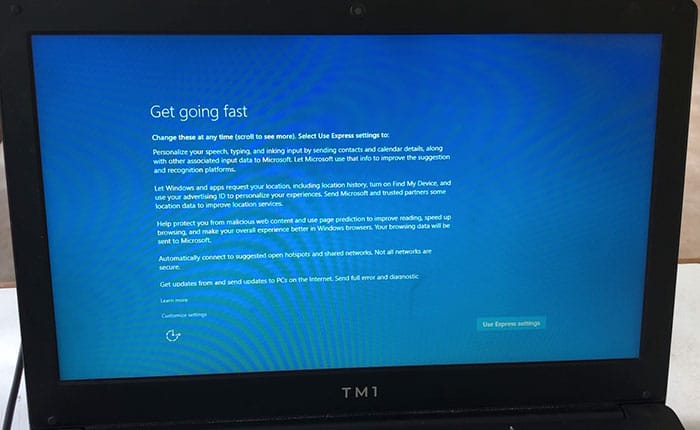
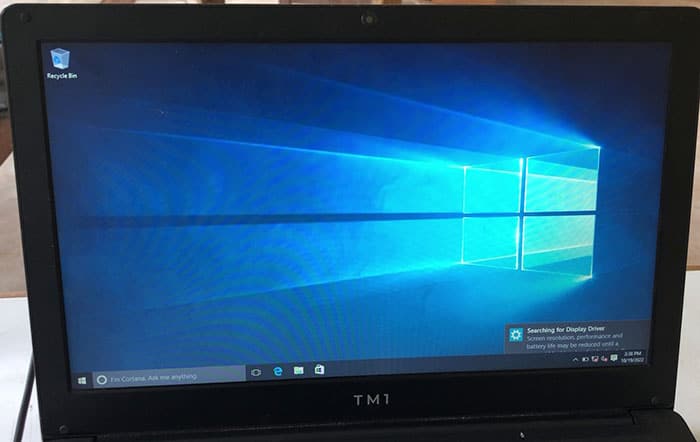
After completing all the on-screen walkthrough settings, you will finally see the Windows 10 Desktop on your TM1 Laptop.
The above tutorial was crafted to be as detailed and easy as possible. However, if you have difficulty performing any of the steps above, kindly watch the tutorial video below or reach out with the comment box below.
Video Tutorial on Installing Windows on the TM1 Laptop
Before you leave this page, kindly support me by subscribing to my YOUTUBE CHANNEL and also join my TELEGRAM GROUP below. This article was written by Sir Boateng Oduro.
Hostinger Sales – Get Up To 85% OFF on Hosting + Free Domain & SSL. Claim Now


There’s a message during the installation saying ” we couldn’t find any drive”
It can be an issue with your hard drive or how it was previously formatted (especially if you formatted it with the GT file format and your Windows is using the MBR.
I after installing windows 10 the touch pad and sound is not working
Check this article on how to install drivers on the TM1 laptop – http://sirboatengonline.com/how-to-install-all-tm1-laptop-drivers/
This article is also specifically created for TM1 laptop sound related issues – http://sirboatengonline.com/how-to-fix-tm1-laptop-sound-drivers/
Sir Boat, have tried all you possible solutions about the sound drivers but till not functioning.
even tho the sound icon is showing on the system tray.
any help?
The sound icon can show but with a cross symbol at the end. If that is your case then you need to reinstall the windows.
It requested password during installation. Which I found difficult to do, although I have already formatted the entire drive. Please what should I do?
Which version of Windows are you using for the installation? Some versions of Windows created with Rufus come with a default user account. In that case, just hit enter without typing anything when the password field appears.
Hi sir, please my tm1 laptop had a sound problem so I tried to install a new windows but now the windows is not showing at all. When turned on, it says ” scanning and repairing drive” but after it loads to 100 then the screen goes dark.
Can you help me please.
You have a problem with the TM 1 Windows installation. Try to install a different version of Windows (preferably Windows 10 Home Basic). If the problem persists then you need to change the SSD.
Sir please there is a command prompt on the laptop which is preventing me to start the installation.
The command prompt indicates a failed TM1 laptop keyboard or SSD. Connect an external keyboard and quickly press the boot menu key (F7 on TM laptops) to enter the boot menu.
Sir boat my problem is that I really forgot my password and I can’t have access on my Tm1 laptop I need ur help thank you
Thanks for reaching out! If you’ve forgotten your Windows password, there are a few ways to reset it depending on how your account is set up. If you’re using a Microsoft account, you can reset the password online at https://account.live.com/password/reset.
If it’s a local account, you may need to use a password reset disk (if you created one) or boot into recovery mode to reset it. Feel free to message me privately if you need step-by-step help. I’ll do my best to assist you.